Overview
Updated 06/24/2021
In the event a specific amount is desired on a paycheck, changing a time entry transaction from 'Net' to 'Gross' automatically adjusts a check amount to reflect the wanted value.
For instance, if a check with the exact value of $1000 is needed for an employee, the application can automatically consider what deductions (taxes, FICA, etc.) will be taken out of the check to arrive at exactly $1000, then increase the gross value of the check to arrive at $1000 net.
In the example below, a check for exactly $1000 is needed. That value is added into the Net Pay field and the application calculates that the Gross Pay will amount to $1385.54 to account for $385.54 worth of deductions detailed below.

Requirements
Sequence
Changing a transaction from 'Net' to 'Gross' must happen BEFORE the transaction is associated with a Time Entry batch.
Config Option

The config option txn_GenerateNetToGross must be activated to allow a payroll administrator to apply a Net to Gross adjustment.
Apply a 'Net to Gross' Adjustment
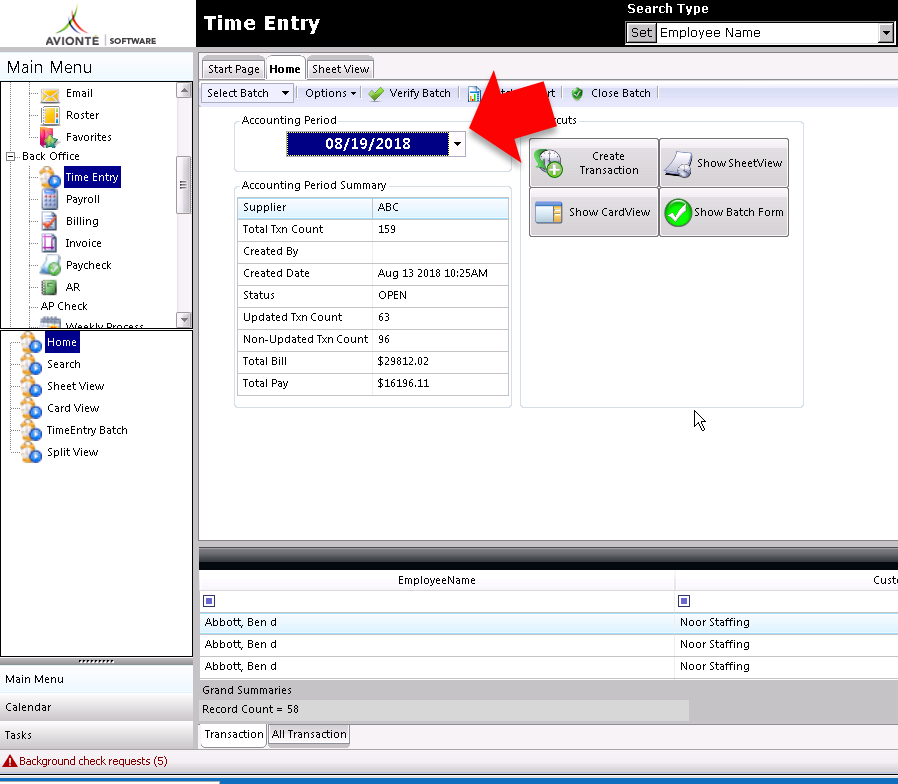
- Navigate to Main Menu > Back Office > Time Entry
- Select an Accounting Period.
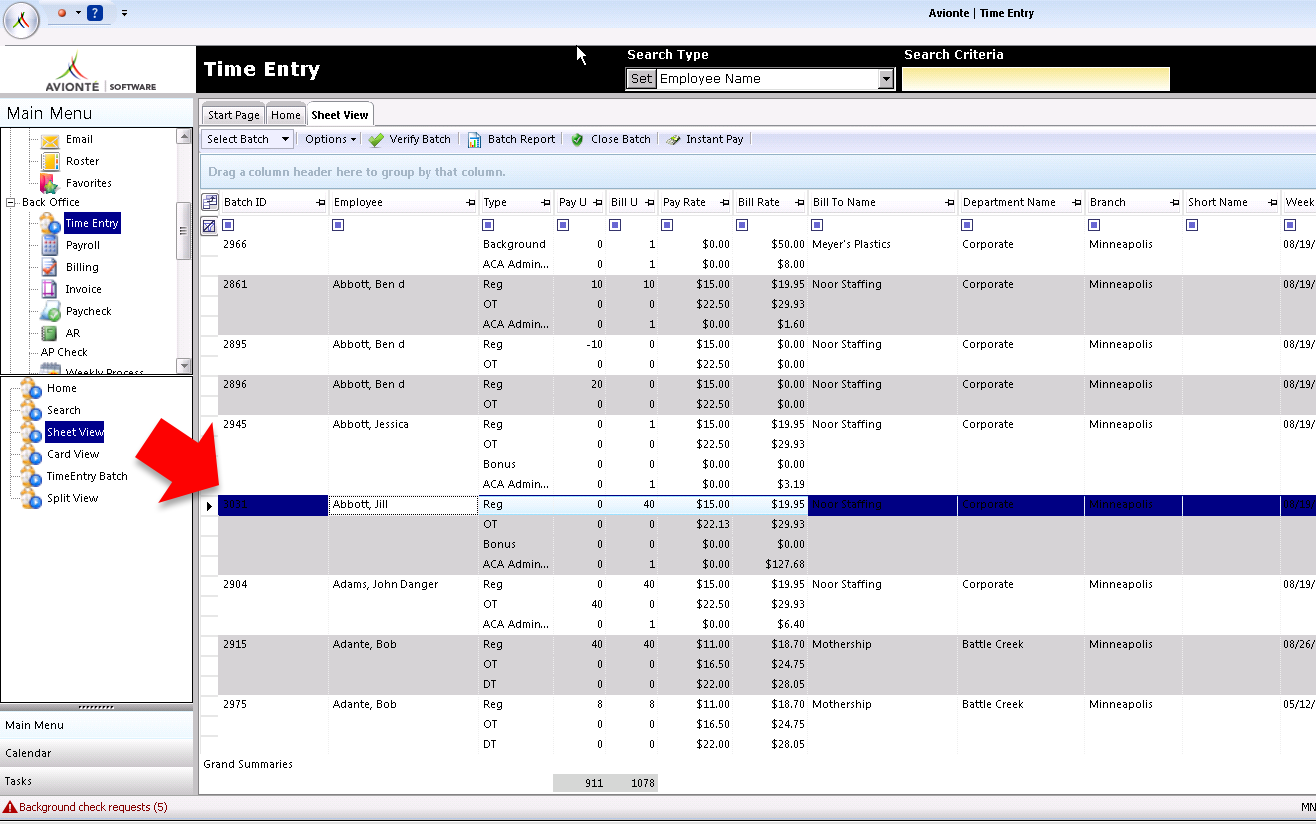
- Click Sheet View on the sub-menu to display a list of all the employees in the accounting period. Search for the specific employee that will receive the adjusted check.
- From Sheet View, double-click on the employee's row. The Card View of the transaction displays.
- While in Card View, click the Actions menu.
- Select "Net To Gross".

- The Generate Net To Gross window displays. In Net Pay, enter the amount of the check.
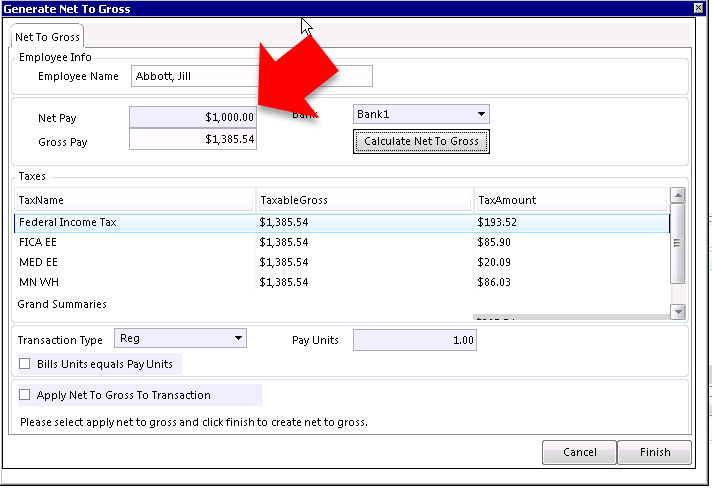
- Select the Bank from which the check will be paid.
- Click Calculate Net To Gross
- Select a Transaction Type (Reg is default)
- Select Pay Units (e.g. hours)
- Check Bills Units equals Pay Units if the amount billed to a client will equal the amount of pay units applied to the transaction.
- Check Apply Net To Gross To Transaction
- Click Finish.
- The Time Entry Batch window displays.
Close the Time Entry Batch.
-
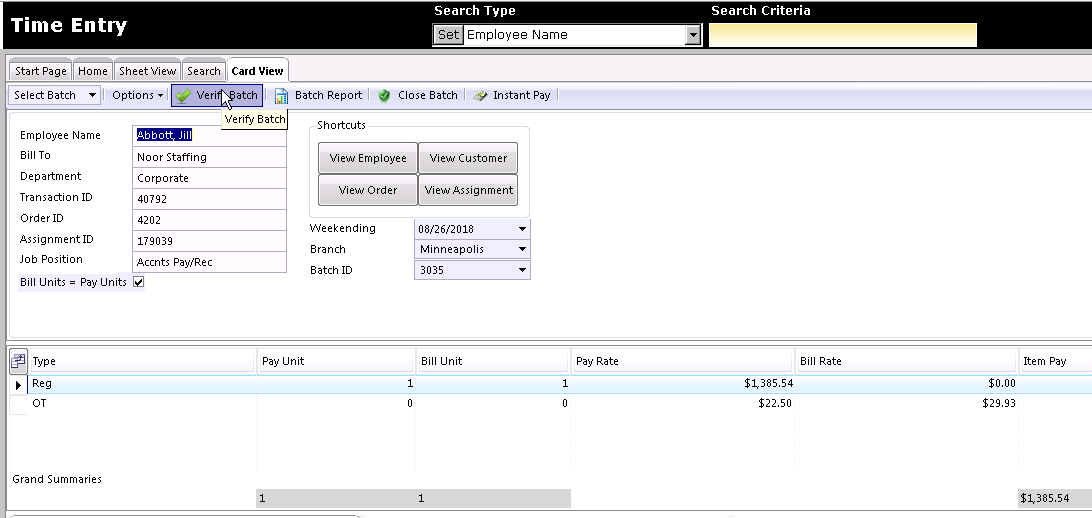
- Click Verify Batch
- If errors are generated, resolve them.
- Verify again
- Click Close Batch
- Click OK when prompted to close batch.
- A check is now available for payroll processing.
- Continue with a standard payroll batch process. (Main Menu > Payroll article)
- Click Verify Batch
Comments
0 commentsPlease sign in to leave a comment.