Overview
Updated 07/07/2021
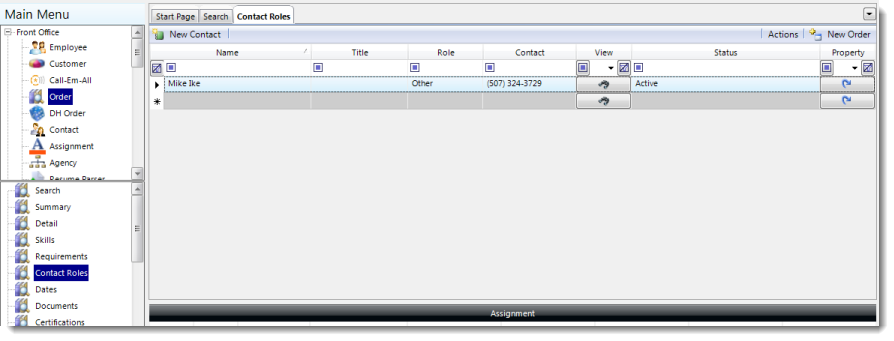
The Order Contact Roles section displays all contacts connected to a specific order. Each contact and their role is listed in sort order in the upper grid so it is easy to see how each contact relates to a specific order. Information for each contact (i.e. their related customer or agency, department, role, if they are active within the company, etc.) can be found here. A contact role can be added or edited by viewing the contact and navigating to the Contact Detail screen.
This tab also displays a list of the employees who are on assignment for this customer, along with information specific to that assignment.
Additional information related to this order, such as Order Extra information, requirements and skills required for the job are listed.
Add a New Contact
- From the Main Menu, navigate to Order > Contact Roles
- Click the New Contact button in the upper-left corner of the panel. The "New Contact" window will display.
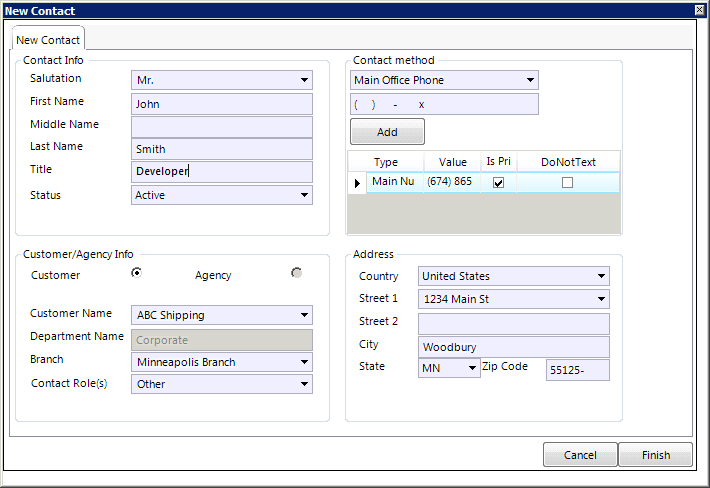
- In the "Contact Info" group, populate the fields according to these definitions:
Field Description Salutation Preferred greeting salutation for the contact. First Name The contact's first name. Middle Name The contact's middle name. Last Name The contact's last name. Title The contact's occupation title. Status The contact's current status (active, inactive, etc.) from the drop-down menu. - In the "Customer/Agency Info" group, populate the fields according to these definitions:
Field Description Customer or Agency Choose a button depending on the customer being assigned to a customer or an agency. Customer/Agency Name The customer or agency's name. Department Name The specific department to which the customer belongs. Branch The specific branch to which the customer belongs. Contact Role(s) Select from option populated from role entered for the selected customer. - In the "Contact Method" group, populate the fields according to these definitions:
Field Description Method Drop-Down The method of contact for this contact. Contact Method Value The specific address or phone number for this contact method. Contact Method Table Displays the saved contact method for this contact. - In the "Address" group, populate the fields according to these definitions:
Field Description Country The country where the contact resides. Street 1 The contact's street address. Street 2 The contact's street address. City The city where the contact resides. State The state where the contact resides. Zip Code The contact's residential zip code. - Click Finish to save the contact. The information will appear in the grid.
Delete a Contact Role
- From the Main Menu, navigate to Order > Contact Roles
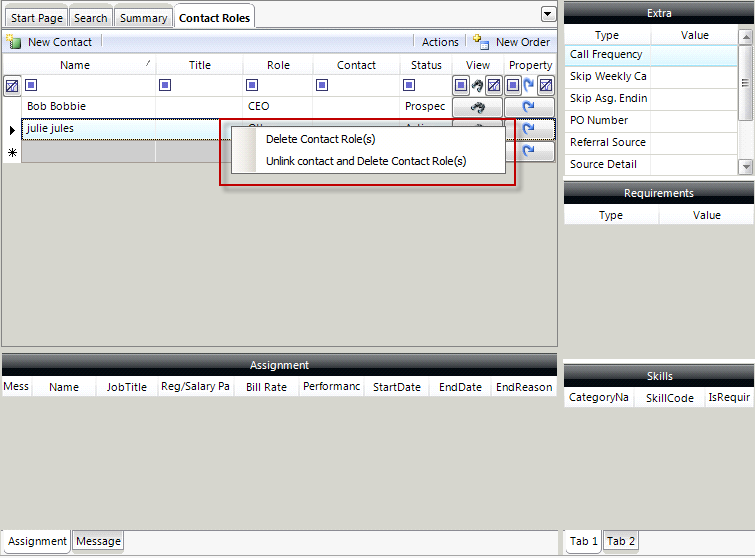
- Select a contact name from the grid. Once the contact name has been selected, it will be highlighted.
- Right-click somewhere in the highlighted area.
- Select either Delete Contact Role(s) or Unlink contact and Delete Contact Role(s) to remove the contact role from the page. This will also remove the contact role from the Contact's contact role page as long as no other orders or departments are using that same contact.
Comments
0 commentsPlease sign in to leave a comment.