Overview
Updated 06/25/2021
A web user can view all time cards for a selected work week in the Time Entry Summary section. The Summary section allows users to enter, save, submit and approve time. Time that has been entered through a time clock or the employee portal will also display in this section. Ensure that the Customer Portal has been set up and configured prior to approving time. For more information on how to set up the Customer Portal, see the Time Approval - Customer Portal Set Up article.
Customer Portal - Summary Section Overview
Add Additional Items (i.e. Mileage, Equipment, etc.)
Customer Portal - Summary Section Overview
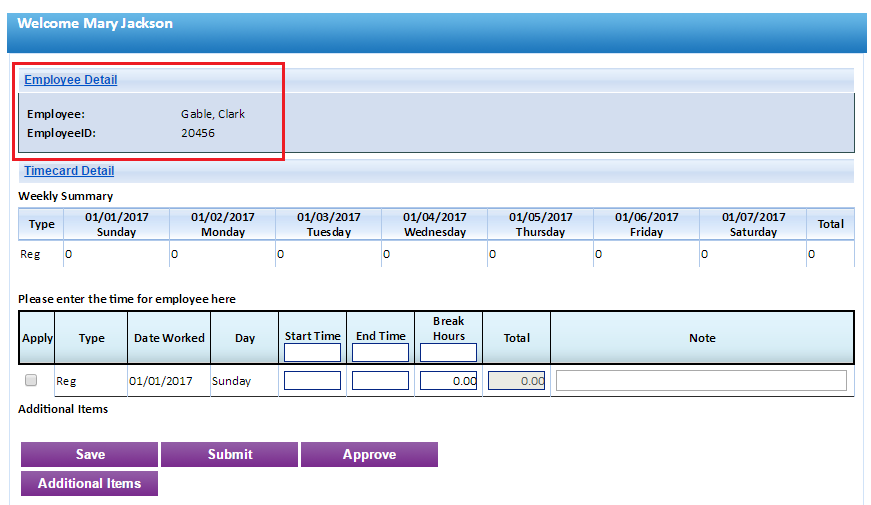
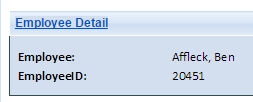
Employee Detail Section
The Employee Detail section displays identifying information about the selected employee.
| Field | Description |
| Employee | Displays the employee's name in the format of Last Name, First Name. |
| EmployeeID | Displays the employee ID. |
Timecard Detail Section
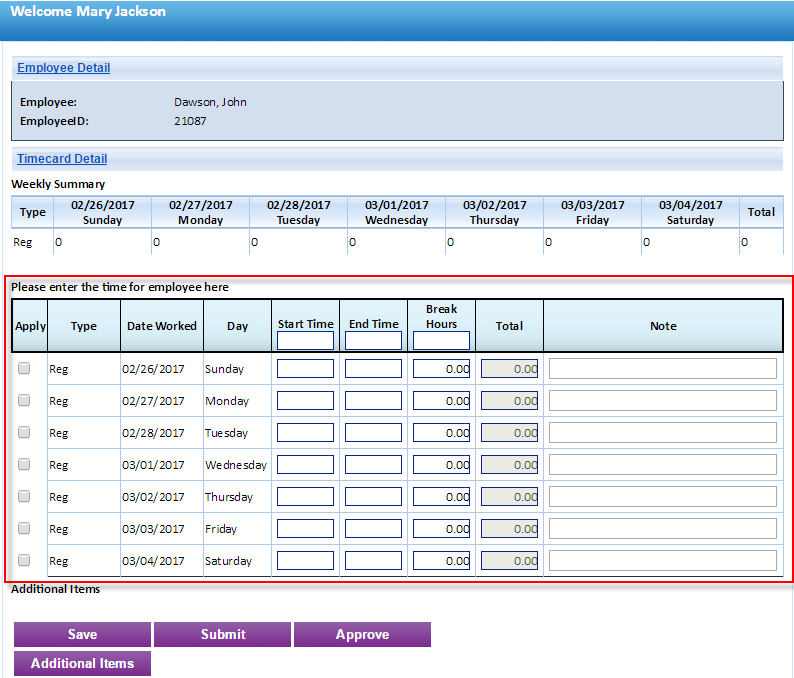
The Timecard Detail has two sections, the Weekly Summary and Enter Time sections.

Weekly Summary
This section displays a summary of all the time entered for this employee in a given week. The Weekly Summary section displays number of hours worked per day with a weekly total located at the end of the row. If an employee has multiple transaction types, such as regular, overtime, mileage, etc., each type will be displayed in its own row.

Enter Time
Time can be entered in the Enter Time section, which is marked with "Please enter the time for employee here." The information in each column is described in the table below. For more information on how to enter time, see the Add Time section below.

| Column | Description |
| Apply |
Mark the check box next to the date to apply the times listed in the header row to that individual date. |
| Type | Displays the transaction type. |
| Date Worked | Displays the date. |
| Day | Displays the day of the week. |
| Start Time | Displays the start time for the day. Note: This box is editable for non-submitted time cards. Times entered in the box in the header row are applied to all days with the Apply check box marked. |
| End Time | Displays the end time for the day. Note: This box is editable for non-submitted time cards. Times entered in the box in the header row are applied to all days with the Apply check box marked. |
| Break Hours | Displays the break hours for the day. Note: This box is editable for non-submitted time cards. Break time is displayed in hours or portions of hours. A 30 minute break would be entered as .5 hours. Times entered in the box in the header row are applied to all days with the Apply check box marked. |
| Total | Displays the total time worked for the day. Note: This time is calculated and is not editable. |
| Notes | Additional notes regarding the day worked. |
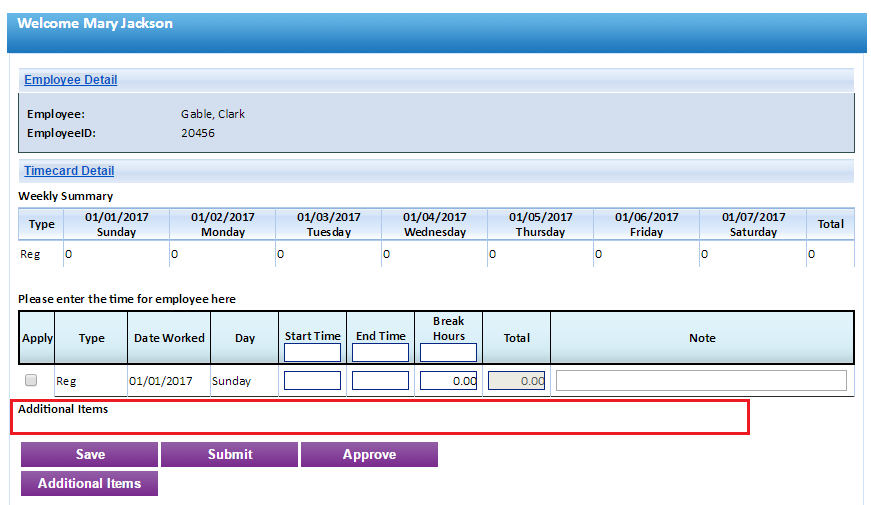
Additional Items
Additional items such as mileage charges, equipment charges, drug test charges, etc. can be entered as part of Time Entry. Any additional item that has been added will display in its own row in the Weekly Summary section. For more information on adding Additional Items to this section, see the Add Additional Items (i.e. Mileage, Equipment, etc.) section below.
Action Buttons
The action buttons at the bottom allow the user to take action on the time that was entered. From here, time can be saved, submitted, approved or rejected. For more information how to perform these actions, see the Action Buttons section below.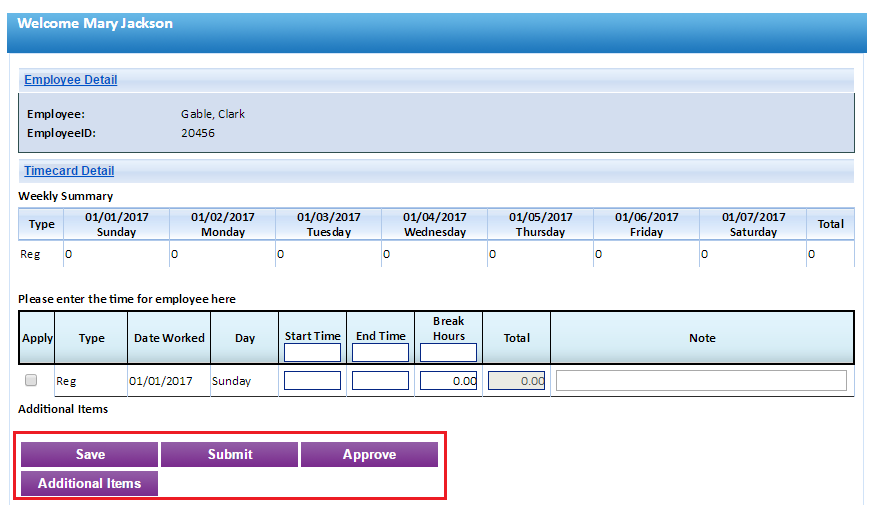
Navigate to Summary Section
- Log into the Customer Portal.
- Click Time Entry from the top menu.
- Click Summary from the menu on the left side of the screen.
- Under Select Week End Date, select a work week from the drop-down menu.

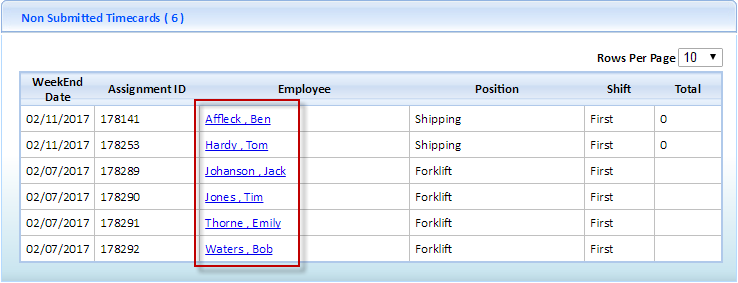
- Click the Employee Name link under the Employee column to view additional details about the employee. The Employee Summary page opens.
Add Time
- Ensure the correct employee has been selected by referencing the Employee Detail section.
- Ensure information in the Timecard Detail section are accurate for the selected employee.
- Under "Please enter the time for employee here," enter the Start Time, End Time and Break Hours in their corresponding columns. The same hours can be applied to multiple days or custom hours can be entered for each day worked. See the chart below for instructions on each method:
Method Process Enter the same Start Time, End Time and Break Hours for multiple days. - Enter the Start Time, End Time and Break Hours in the blue header bar.
- Click the checkboxes under the Apply column next to the days where that time should be applied.
- Click Save or Submit.
Enter different Start Time, End Time and Break Hours for each day individually. - Enter the Start Time, End Time and Break hours in the blank fields under each day of the week.
- Click Save or Submit.
- Enter the Start Time, End Time and Break Hours in the blue header bar.
Add Additional Items (i.e. Mileage, Equipment, etc.)
- Click the Additional Items button at the bottom of the screen, below the Action buttons. The Add New Other Time window will display as a pop-up window.

- Enter information:
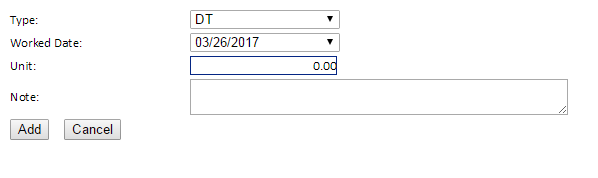
Field Description Type: Select the transaction type from the drop-down menu.
Note: The transaction types available are populated if the Allow Web Time Entry check box is marked in Admin Tools > Transaction Type > Detail section. For more information on transaction types, view the Admin Tools: Transaction Type help page.Worked Date: Select the date from the drop-down menu.
Note: The dates are populated based on the work week of the selected time card.Unit: Enter the number of units. Note: Enter any additional notes to the transaction type. - Click Add to add the item to the Employee's time card. Click Cancel to close the window without saving changes.

- The additional items will appear at the bottom of the timecard. Click the
 to edit the item or click the
  to delete an item.
Action Buttons
- Enter time in the employee's timecard using the instructions listed under the Add Time section.
- Take action on the entered time:
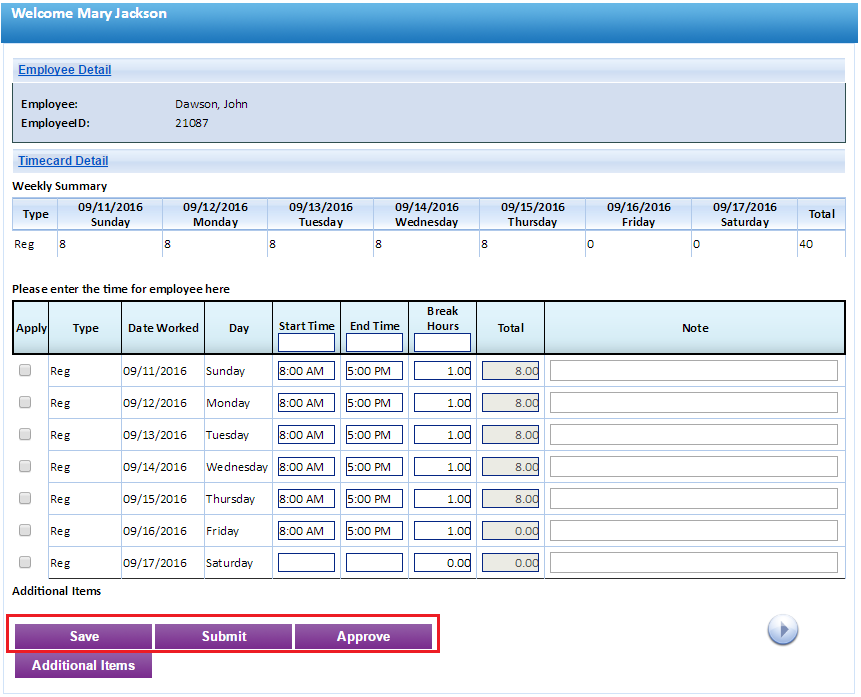
Button Description Save Saves the time entered without submitting it. Submit Submits the time entered. Approve Approves the time entered. - After an action has been taken, a pop up will display confirming that the action was successful.
- If the Submit or Approve buttons were clicked, the Reject button will also display.

- Click either Approve or Reject to take that action on a timecard.
Button Action Approve After this button is clicked, a notification that the action was successful will display. All buttons will be un-clickable except for the Reject button. It is possible to reject time after it has been approved. Reject After this button is clicked, a field displays below the action buttons. Enter a reason in the Enter reason for reject field. Once a reason has been entered, click either Reject or Cancel. - Click the
 button to move to enter time in the Summary section for the next employee.
Comments
0 commentsPlease sign in to leave a comment.